


 English
 Portuguese
 Spanish
 French
 German
 Japanese
Share
Are you troubled by the issue of the Samsung solar remote not charging? The issue might be quite troublesome because an unchargeable solar remote is only a useless block. But luckily, there are some ways to make your remote chargeable again and they are displayed below. Even if the remote loses its value eventually, there is an equally economical and eco-friendly way to control your Samsung TV. Start reading.
Table of Contents
About Samsung Solar Remote
How often do you change batteries for your TV remote? Generally speaking, people do that every one to two years. Certainly, the period can be sharply shortened to 6 months or even shorter for high-frequency usage or misuse. The fact of swapping batteries might be more frequent than the theory. Moreover, replaced batteries belong to harmful garbage, and if they are not dealt with properly, they can cause heavy mental pollution to the environment.
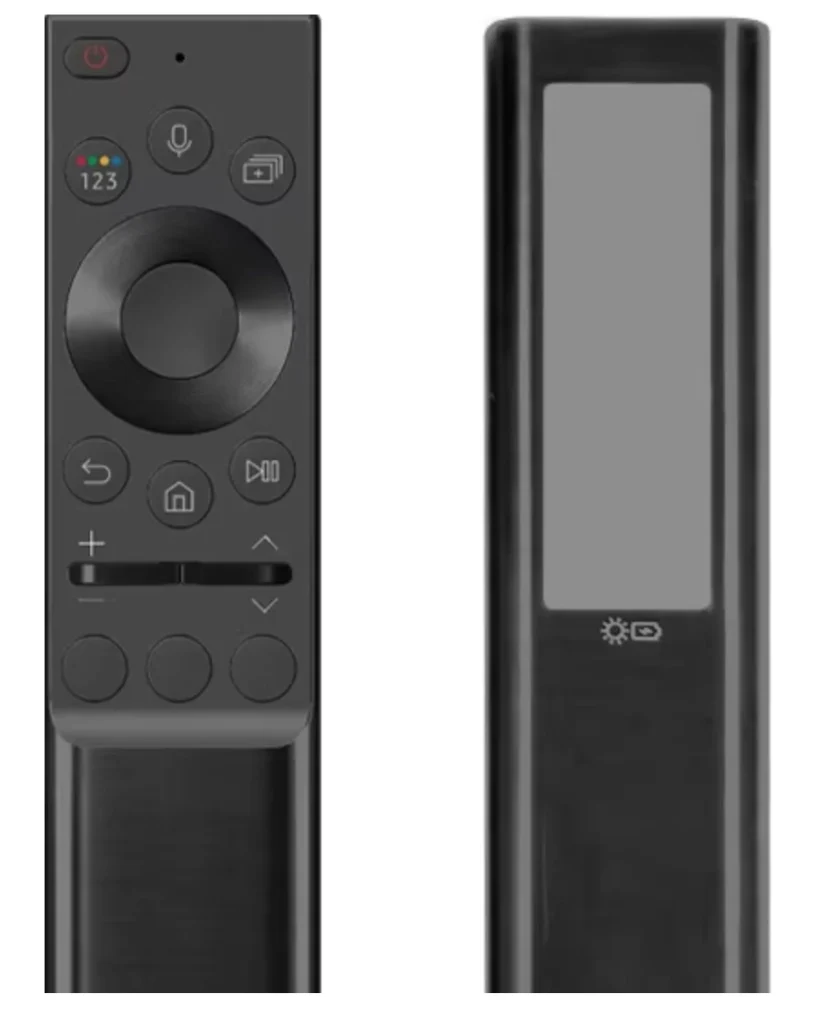
To get rid of the hassle of battery replacement and protect the ecosystem, TV manufacturers have launched chargeable remotes, and the Samsung SolarCell Remote is such one. The solar remote comes with a solar cell on its back that absorbs sunlight or even indoor light to charge the internal battery.
In general, a fully charged battery for the remote can last up to two years, and the battery life is affected by the amount and type of use and natural factors, including temperature and humidity. Once the battery comes to the end of its life, it needs to be replaced by an authorized service provider from Samsung. To check the battery status of the Samsung solar remote, press the Home button on the remote, navigate to Settings > General > Power Energy Saving, and check the battery percentage on the screen. If the battery percentage is too low, the remote needs to be charged right now to ensure that it can function properly and respond immediately.
However, the battery percentage doesn’t increase as expected after charging. Lots of Samsung solar remote owners have been vexed about Samsung TV solar remote not charging. If you run into the same trouble, you can follow the troubleshooting guide below.
Fix 1. Remove Obstructions
How to charge Samsung solar remote? If you charge your Samsung solar remote through sunlight or artificial light, please make sure your remote is receiving direct light.
So, if there is any obstruction blocking the solar panel, remove it right now, including the debris, dirt, etc. To clean the solar panel, you can use a soft brush and a wet cloth. Then, see if the charging process goes smoothly.
The other important point, in this case, is that the solar cell of the remote should be exposed to a place with decent sunshine. How long it takes to charge the Samsung solar remote depends on the amount of light exposure. Generally, it may take one hour to charge the remote with sunlight. Therefore, move your remote to a place with abundant sunlight and place it face-down in direct light.
Fix 2. Try Charging by USB-C Port
Compared to charging your remote with sunlight or indoor light, charging the remote by USB-C port is more efficient: it takes about 30 minutes for the battery to reach full juice, which is around 2x faster.
If your remote battery is too low, use a USB port for faster charging. Moreover, if the remote has been idle for a long time, it may lose its charge completely. In this case, charging the remote in this way before it will work with the solar panel.
To charge your Samsung solar remote in this efficient way, you need to perform the following steps:
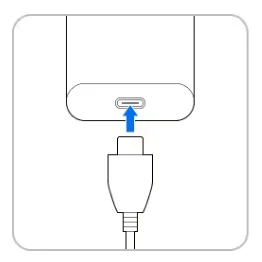
Step 1. Find the USB-C cable and plug it into the port on the bottom of the remote.
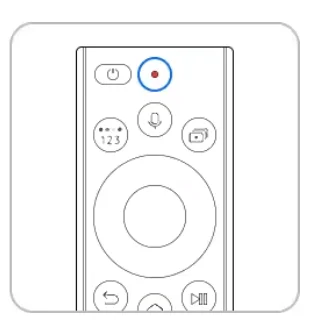
Step 2. Look at the status of the LED on the front of the remote. When the LED turns on, the charging starts, and when the LED turns off, the charging is finished.
Note: Do not use the remote in the charging process. This is for faster charging and maximum usage time.
Fix 3. Reset the Remote
The remote might have internal issues if the above two ways fail. To troubleshoot these issues, the quick way is to reset the remote. Resetting a problematic device always works in many cases, like Samsung TV remote not working.
There are currently two Samsung solar remote models. One was released in 2021 and the other one was released two years later, in 2023.
If you are using the 2021 model, you need to remove the battery from your remote, press and hold the Power button for about 8 seconds, and reinstall the battery.
The process to reset the 2023 model is a little bit different. The process goes like this: press and hold the OK and Return buttons on your remote for about 10 seconds.
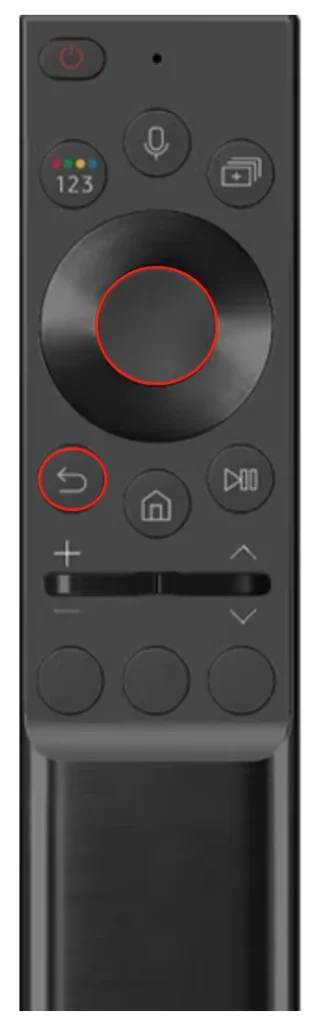
Once the reset initiates, the light on the top of the remote will begin to flash red. When the reset process ends, see if your Samsung TV solar remote is chargeable. If yes, that’s great, wait more than 30 minutes or one hour until the remote gets fully charged.
Fix 4. Replace the Battery
If the battery percentage is still not increased, the battery might have been damaged for some reason. You can shop online to purchase a new battery to replace it. When purchasing, make sure the battery is well-matched with your Samsung solar remote.
Wait patiently for the logistics company to deliver the battery to you. Once you get the new battery, remove the dead batteries from your remote and install the new battery carefully.
Fix 5. Try Samsung TV Remote by BoostVision
If your Samsung solar remote is not charging for a dead battery, the most effective solution is to use a remote app to replace the remote.
Here a remote app could be the best replacement for your Samsung solar remote. First, using the remote app can also say goodbye to the hassle of battery replacement because the app can turn your smartphone or tablet into a remote.

Then, the remote app like the Samsung TV Remote app by BoostVision is powerful. Although it does not have voice control, it also makes your TV control easy. It comes with two convenient features, namely a keyboard and a touchpad.
The keyboard function allows you to launch an on-screen keyboard to input text directly and quickly, which helps you get rid of the hassle of pressing the arrow keys repeatedly on your regular remote. As for the touchpad, it works as the touchpad that built-in a laptop, which allows you to everywhere on your Samsung TV screen by swapping fingertips.
Lastly, the Samsung TV Remote app is a multifunctional utility. It has screen mirroring and media casting features to display your phone screen on a larger screen for a better watching experience.
How to replace your Samsung solar remote with the BoostVision’s app? You need to set up the app on your smartphone or tablet and then pair it with your Samsung TV through the same network. The detailed steps are:
Step 1. Download the app by clicking the following button. Note that the app is compatible with Android, as well as iOS, so choose the version that is compatible with your device.
Download Remote for Samsung TV
Step 2. When the app is installed on your device, launch it and tap the connection icon on its home screen.
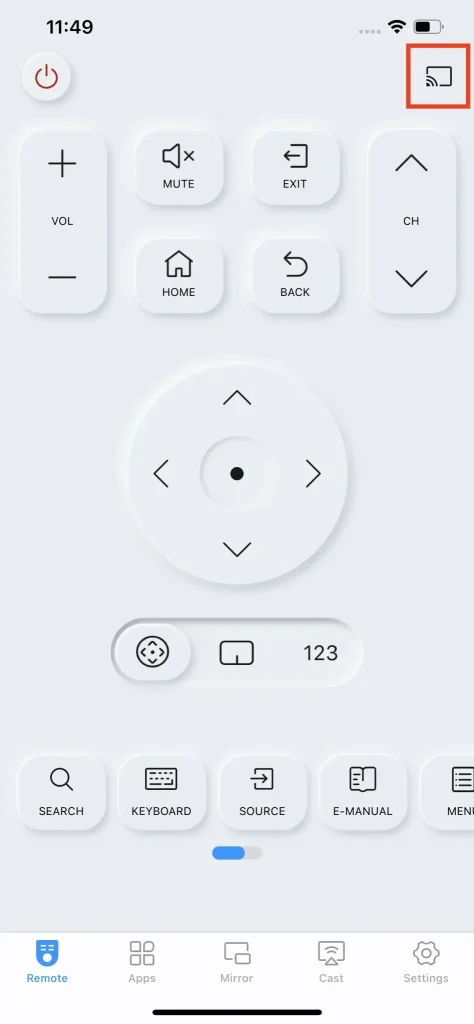
Step 3. Choose your Samsung from the device list. If it is not listed, please make sure your device and TV are using the same network and then tap the refresh button to reload the list.

Step 4. Use the physical buttons on your Samsung TV (always on the back or side) to choose the Allow option. See How to Press Allow on Samsung TV Without Remote.
Step 5. Once the pairing finishes, the app will return to its home screen. From there, you can tap the displayed buttons to control your Samsung TV effortlessly. For the remote app tutorial, please check Guide to Use Remote for Samsung TV.
Conclusion
Samsung solar remote can’t charge when the solar panel is blocked by plastics or debris. A dead battery or internal issues with the remote is also culpable.
If you have the Samsung TV solar remote not charging issue, first make sure the solar panel is clean and not blocked, then try charging by the USB port of the remote, and reset the remote. If nothing works, replace the battery or replace the remote with the remote app shared above.
Hope the troubleshooting guide can help you. If it does help you, please share it with others.
Samsung Solar Remote Not Charging FAQ
Q: How do I know if my Samsung solar remote is charging?
The direct way is to notice the status of the LED on the top of the remote. If the LED turns on, the remote is charging, and the remote finishes charging, the LED turns off.
The other way is to see if the battery percentage is increased. To check the battery percentage, you need to go to Settings > General > Power Energy Saving. The percentage may increase slowly if you charge the remote through sunlight. So, check the percentage after a few minutes.
Q: How long do Samsung solar remotes last?
Under normal usage, Samsung solar remotes can last up to two years. To extend its lifespan, avoid it from falling on the ground and charge it regularly.
Q: How do I change the battery in my Samsung solar remote?
There are two ways to charge your Samsung solar remote.
The faster one is to charge your remote via a USB-C cable and it takes about 30 minutes to get full power capacity. Your Samsung solar remote should have a USB port at its bottom, which allows you to plug your remote into the power source via a USB-C cable.
The slower one is to charge your remote with sunlight or other light source like a lamp, which will take more than one hour to be fully charged. In this way, you need to place the remote face-down in direct light to expose the solar cell on the back.
Q: Why is my Samsung solar remote not working?
The most common reasons include low or dead battery and hindered IR communication. So, when your remote doesn’t function properly, check its battery percentage through Settings > General > Power Energy Saving. If it is too low, charge the remote with a USB port or sunlight or indoor light. If the left power is enough, check if there is any obstruction on the path between your remote and TV. If yes, remove it.
Vicky Green is a web content editor from BoostVision who updates blogs regularly to help readers enhance their TV experience and watching experience. She believes that endless passion, enough patience, and strong critical thoughts can generate great success.